In this article, we will walk through the process of building a WhatsApp KPI bot. The steps we will cover include:
- Creating a Meta app
- Adding WhatsApp to the app
- Developing an app that collects KPIs
- Setting up a webhook that responds to chat messages
- Integrating the Chat GPT API to add AI capabilities
The technologies we will be using are:
- Meta WhatsApp API
- ASP.NET Web Services
- SSL/HTTPS
- Docker
- Git
The code related to this article is available on GitHub.
Creating the Meta App
Firstly, you need to have a Meta Developer account. You can create one here. An app in this context is essentially a container that encapsulates several Meta APIs.
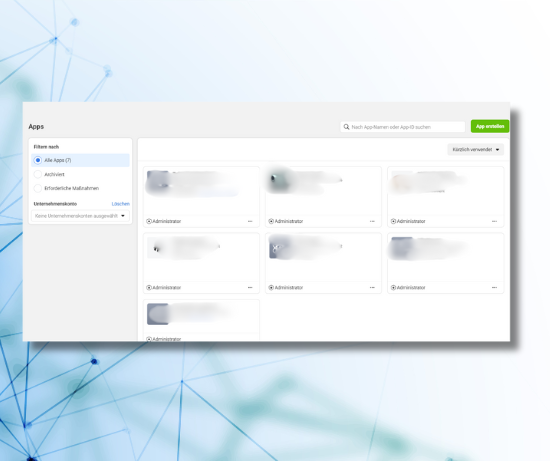
To create a new app, navigate to the Meta App Dashboard and click on “Create App”. Next, we will add the “WhatsApp” product to the app by following these steps:
- Click on “Create App”.
- Select “Other” as the app type.
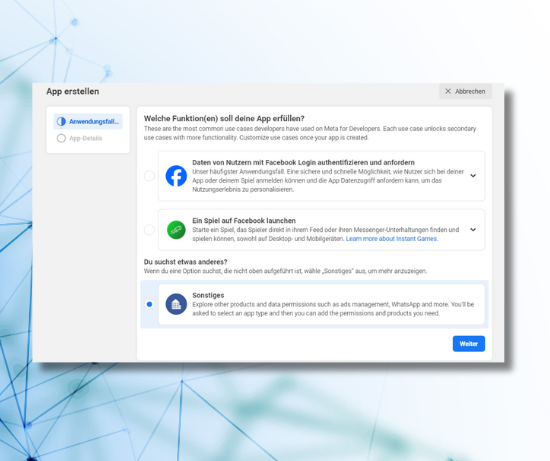
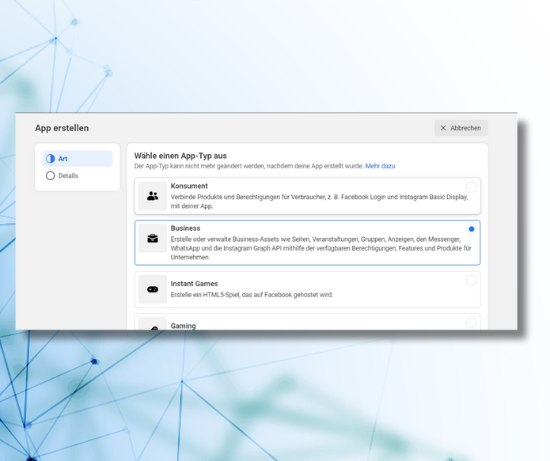
- Choose “Business” as the app type.
- For now, leave the “Business Account” field empty.
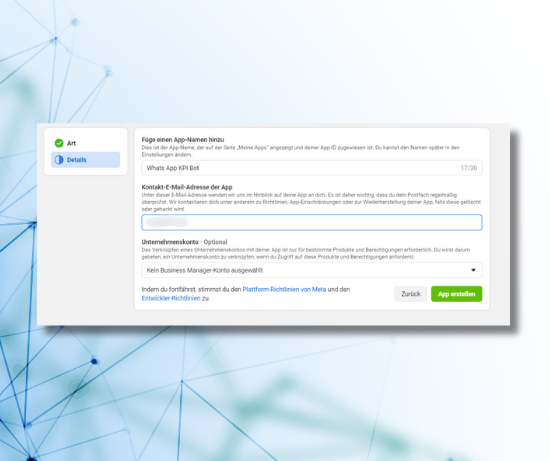
- Click “Create” to generate the app.
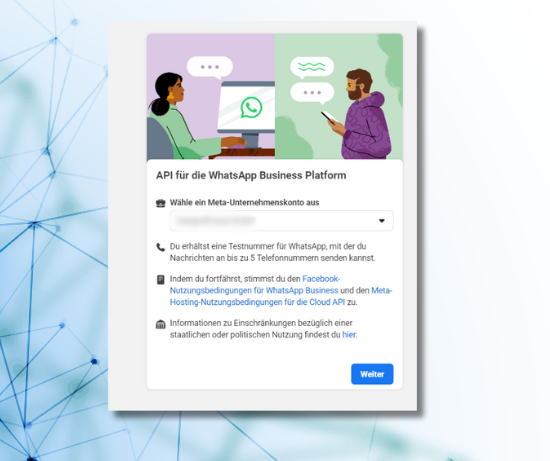
- You are now in the app dashboard. Click on “Add Product” to include the “WhatsApp” product in the app.
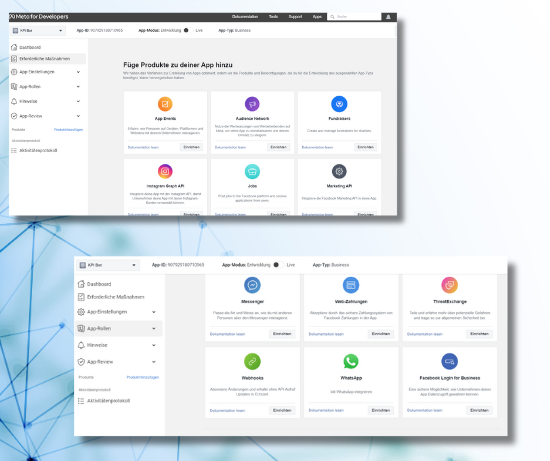
- To use the WhatsApp Business Platform API, you need to add a “Business Account” to the app. Select one from the dropdown menu.
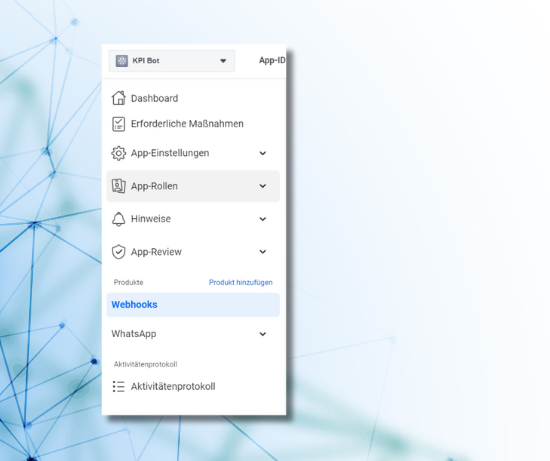
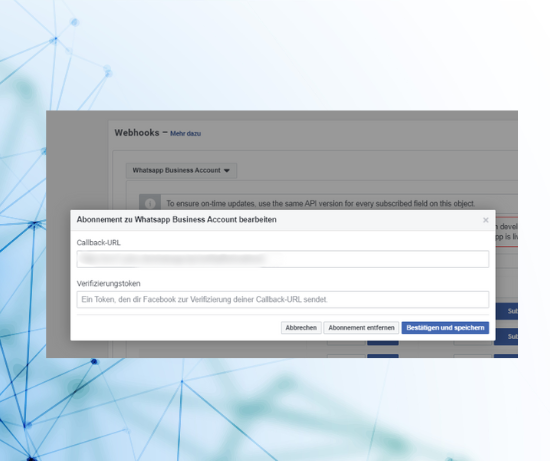
- Wait a few seconds and you will see that the “Webhooks” product has been automatically added to the app under Products.
- You can now add your phone number to the app.
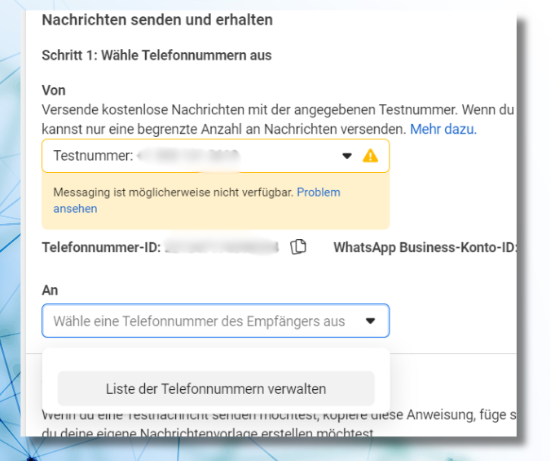
- Click on “Add Phone Number” and input your phone number.
- You need to verify your phone number next. You will receive a code via SMS. Enter this code in the app to verify your phone number.
- You can now send your first message to the app. Click on “Send Message”, type in a message, and you will receive it on your phone.
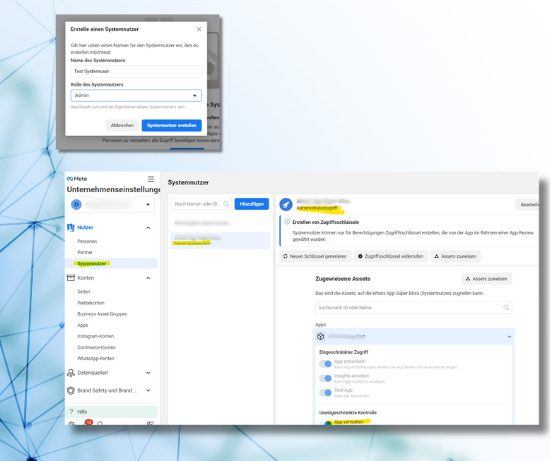
Creating a System User
To authenticate with the Meta API, bearer tokens are required. We need a bearer token that does not expire. Therefore, we need to set up an admin system user, link it with the Meta App, grant the required permissions, and securely store the provided token.
- Navigate to the Meta Business Settings and create a new system user.
- Ensure the new system user has admin rights.
- Add the app as an asset to the system user.
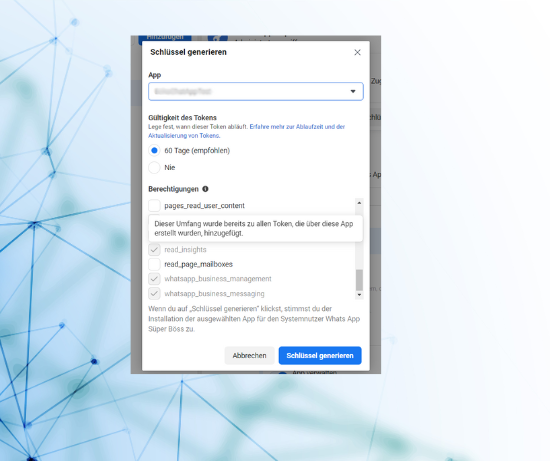
- Generate a new token for the system user. Add whatsapp_business_management and whatsapp_business_messaging permissions to the token.
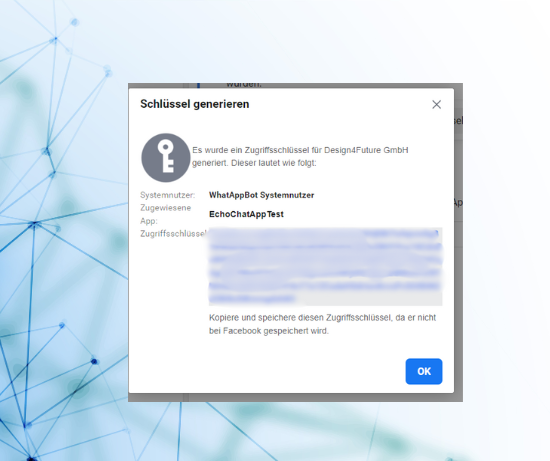
- Securely store the token, as we will need it later to authenticate with the Meta API.
Setting Up the Web Server with HTTPS
For development, I prefer using my own virtual servers as they are more cost-effective than Azure. However, this means I have to handle some setup tasks myself. I use Let’s Encrypt for HTTPS and Nginx, which runs in a Docker container, as the web server. For this app, we will add a new configuration to the Nginx sites-available folder.
Since the app will be running under a virtual folder, we use a rewrite directive to forward the request to the app and remove the virtual folder name before calling the ASP Web App.
- Open the Nginx configuration file:
vim /etc/nginx/sites-available/myapp.server.de
server {
    listen 443 ssl;
    server_name myapp.server.de;

    ssl_certificate /etc/letsencrypt/live/myapp.server.de/fullchain.pem;
    ssl_certificate_key /etc/letsencrypt/live/myapp.server.de/privkey.pem;

    location /whatsapp-kpi-bot {
        rewrite ^/whatsapp-kpi-bot(.*)$ $1 break;
        proxy_pass http://localhost:5072;
        proxy_http_version 1.1;
        proxy_set_header Upgrade $http_upgrade;
        proxy_set_header Connection keep-alive;
        proxy_set_header Host $host;
        proxy_cache_bypass $http_upgrade;
    }
}
Now only restart the nginx server to apply the changes
docker restart nginx
Setting Up the Project in Visual Studio with Docker Support
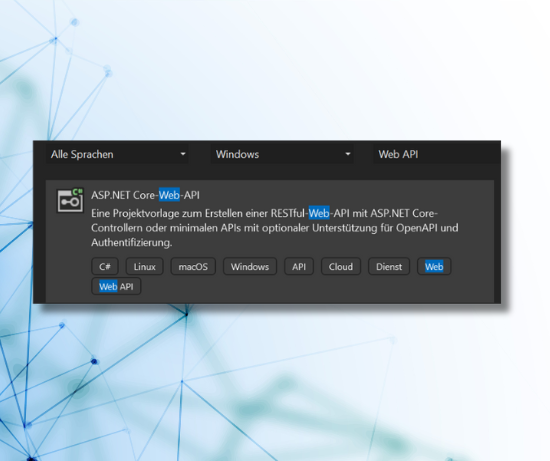
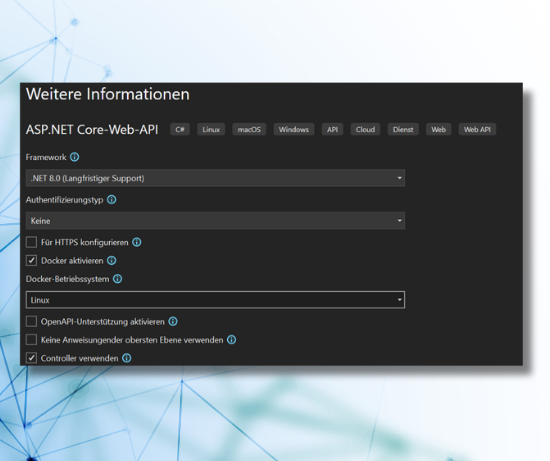
- Start by creating a new ASP.NET Core Web API Application.
- Next, enable Docker Support for the application.
Testing the App Locally
Visual Studio has automatically generated the boilerplate code for us. For an initial test, we will deploy the app to the server using this code. Later, we will modify the code to suit our needs, transforming it into a Webhook for the Meta API.
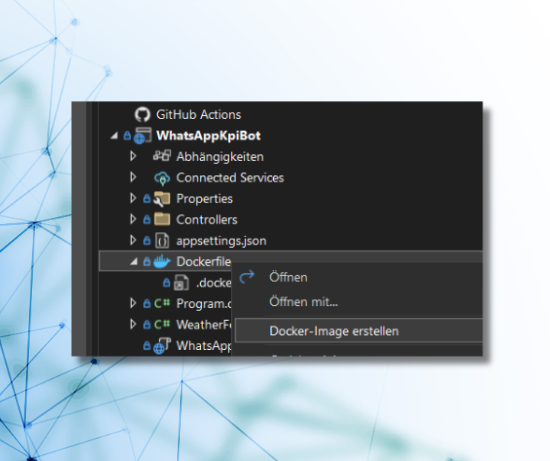
Building the Docker Container from the Dockerfile
Visual Studio has automatically created a Dockerfile for us. We can build the container by right-clicking on the Dockerfile and selecting “Build Image”.
The Docker container is now visible in Docker Desktop.
We can run the app in the Docker container by pressing “F5” in Visual Studio. The app is now running in the container, and a browser window opens to display the app. In my case, the app is running at the following URL: http://localhost:5072/weatherforecast
With the app running in the container, we can now deploy the container to the server.
Deploying the Container to the Server
To deploy the container to the server, we first need to export the container as a tar file.
docker save -o whatsappkpibot.tar whatsappkpibot
Now we can copy the tar file to the server and load the container. I prefer using scp for that.
scp /mnt/d/repos/dockerimages/whatsappkpibot.tar root@myserver.de:/root/repos/dockerimages
Now the tar file is on the server. We can load the container by running the following command
docker load -i whatsappkpibot.tar
Now the container is loaded and we can run it by running the following command
docker run -d -p 5072:8080 --name whatsappkpibot whatsappkpibot
Now the container is running and we can check if the app is running by running the following command
curl -X GET http://localhost:5072/weatherforecast
Also we check if the app is accessible from the outside under https by running the following command
curl -X GET https://myapp.server.de/whatsapp-kpi-bot/weatherforecast
And to make thinks complete we check if the app is accessible from the browser by entering the following url
https://myapp.server.de/whatsapp-kpi-bot/weatherforecast
Coding & Setting up the Webhook
The coding is actually the last part in the process of setting up the WhatsApp App. Please find the sample code related to this article on GitHub here.
Receiving Messages from WhatsApp Users
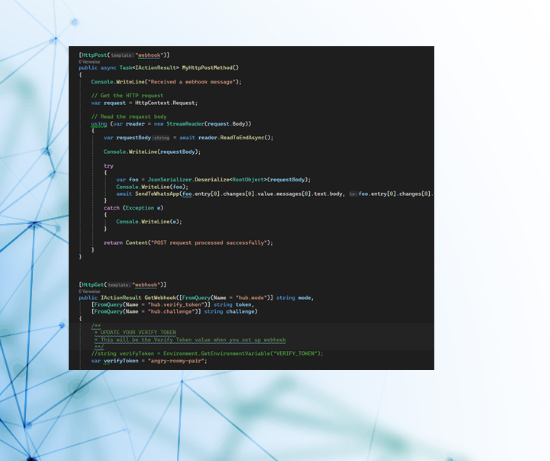
To receive WhatsApp messages with our bot, we need to set up a webhook in the “Webhook Product” that was added to the Facebook app earlier. Therefore, we need to create a method that acts as a handler for both POST and GET requests under the same URL. The GET handler needs to understand a token that is also set when adding the webhook. Find the code here
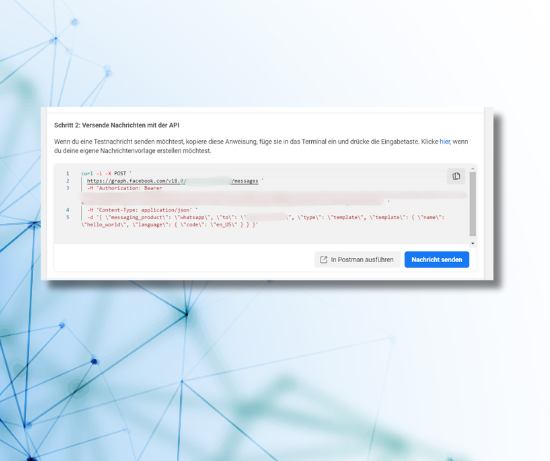
Sending Messages to WhatsApp Users
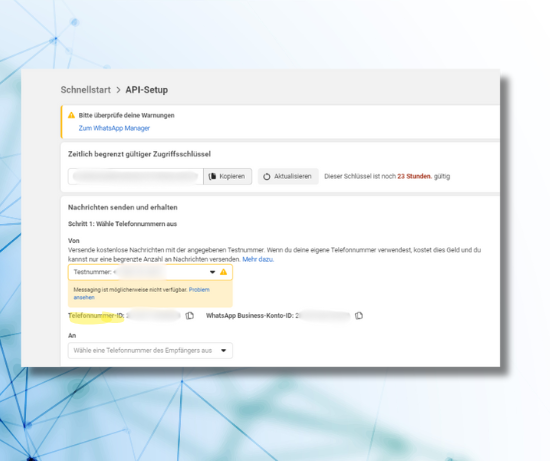
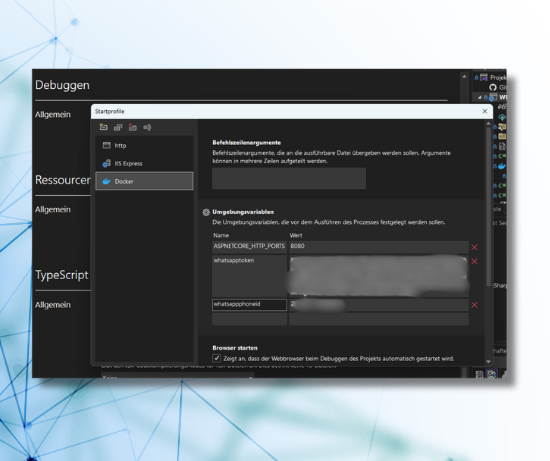
To send messages to a WhatsApp user, we need to call the API. Therefore, we use our token from the System User that we stored earlier and the phone number id that you can find in the WhatsApp -> API Settings in the Meta App Dashboard.
Add these values as environment variables to the Visual Studio Debug Configuration.
Find the code here
Implementing a Chat Conversation
Now that we know how to receive and send messages, the next step is to facilitate an actual chat-like conversation with the user. In this example, we will simply echo the received message. To achieve this, we integrate the webhook method with the send message method. Whenever we receive a message, we read the content of the message and the phone number of the sender, then reply with the same message.
And that’s essentially it!
Enhancing the Bot’s Functionality
With a basic conversation flow established, we can now consider enhancing the bot with additional use cases. Some ideas include:
- Integrating OpenAI’s ChatGPT API for more sophisticated responses
- Adding reporting functionality to generate and send reports
- Implementing alarms that can be sent out under certain conditions